Many users experience issues with the bobbin on a sewing machine. While it may be difficult to figure out what is causing a jam because it is located inside the machine, most modern sewing machines make fixing this issue easy.
Checking the bobbin tension, thread tension disk, the presser foot, or another area of the sewing machine can help you fix your sewing machine needle and your bobbin problem. Both top and front load bobbins can give users issues. Listed are the various types of problems that both types of bobbins can give, along with solutions for fixing the issue.
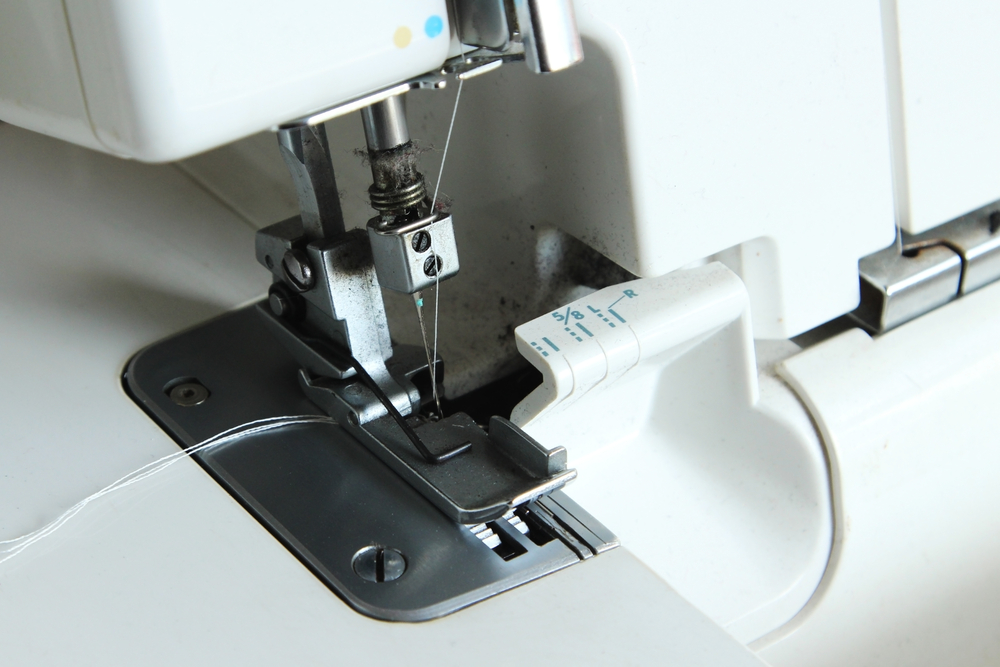
Rethread the Sewing Machine
Sometimes the machine will jam just because it was not threaded properly. This is a common mistake that beginners make when trying to learn how to sew. If the needle thread on the machine is not threaded properly, the thread will get tangled up in it to the point where it will make a buzzing sound when you try to sew and not move until the jam is cleared.
This is on both traditional and modern models alike.
In this case, it’s not a bobbin problem – rethreading the machine is the first step in trying to diagnose what is going wrong, and the common cause of a jam.
To do this, take out the bobbin. Examine the thread and make sure there are no knots. Pull out a bit of thread to ensure everything is running smoothly prior to closing it off.
After inserting the bobbin back into the case, turn the wheel a full rotation towards you. The needle should go up and down. It should also grad the bobbin thread and create almost a loop.
Pull out some of the thread. Move it to the back of the sewing machine and leave it hanging. You are ready to start using the machine for your sewing project.
The Needle May Need Changing
Before proceeding, make sure you are using the proper needle for the density of fabric you are using. It is important to examine the number on the needle. It should match the structure and thickness of the fabric you are using.
If you are unsure as to which need works best for your material, use this guide as a reference.
The needle also should be properly inserted and isn’t bent. If it is bent or the tip is uneven, it can cause problems with the bobbin. It simply won’t grab.
Needles can be bent even if it is not visible. If it is only bent a bit, users may only be able to see this by laying it flat on the table. The cheapest solution is to change it. If the needles haven’t been changed in a long time, it should be changed when you hear strange sounds, or you are having issues with the bobbin.
The correct size needle should also be used. If it is too thin for your fabric, it may bend easily. Also make sure the needle is fastened securely. Loose needles can shatter inside a machine which can lead to expensive problems.
Check the Bobbin
If threading the machine and the needle aren’t the problem, then make sure that the right size bobbin is being used. Bobbins come in many sizes. There are differences in top-loaded and front-loaded bobbins. Additionally, there are contrasts between industrial and home sewing machines.
Industrial sewing machines have a broader bobbin. Users can accidentally insert a bobbin from a home sewing machine into an industrial. This is not advisable since the bobbin is able to move forward and backward in the machine while sewing.
Size also varies by brand as well. Generally, pick the same bobbin as the machine you are using. It will eliminate problems.
Bobbin Thread Will Not Pull Up
Once the needle is inserted, the bobbin thread should easily come up. It should grab the thread while turning the handwheel. If this fails to work, check the bobbin winding spindle. Make sure it is pushed back to the left. The needle will not catch the bobbin thread otherwise. Ensure the pressure foot is up while doing this.
If this does not work, you may have to take it in for repairs.
Your timing could also be off. Needles need to connect with the bobbin threat at the perfect time to form a stitch. If the timing is not exact, the needle can’t pick up the bobbin thread to get the machine ready to sew.
Bobbin Thread is Looping
When the bobbin thread loops to the back of your fabric, there may be an issue with the needle thread’s tension. If the upper thread’s tension is too low, it won’t be able to pull the bobbin thread correctly to do the proper stitch. Therefore, begin by testing the upper thread with a higher tension.
This also causes what is known as thread bunching or bird nesting. This is when the thread can’t perform a proper stitch on the back of the fabric. The user is left with a horribly messy bunch of thread.
If you are unsure as to how to set the tension, begin with a number between 3-5. Then work your way up or down from there.
It should be noted that poor quality thread may cause thread to become stuck. It results in holes, loops, and other issues.
Bobbin Case Should be Examined for Burs
Newer models of sewing machines are using a drop-in bobbin system. Older ones use a front loading system. When a bobbin is inserted into the case, you want to ensure the machine is being threaded according to the instructions located in the manual.
If you are accustomed to working on another type of machine, this other one may be threaded differently.
Therefore, check the machine and discover if the bobbin is put on the front or under the footer.
Stuck Bobbin Case
If the bobbin case is jammed, gently remove it to see what the issue could be. It may have been hit from a strong canvas or a leather needle. Open the small latch so that you can remove it. Try to wiggle the bobbin a bit if you are unable to remove it.
Take out the bottom plate of the machine. Something may be stuck such as a thread, needle, or a bit of fabric.
If you can remove the bobbin case, examine it to make sure there are no burs located on the bobbin case.
You may need to take it in for repairs if the bobbin case cannot be removed and is completely stuck.
Bobbin Case is too Loose
A bobbin case may sound as if it is loose, but it could be the machine’s bottom plate that needs to be more secure. If it is the bobbin case, make sure it is inserted properly. Begin by turning the handwheel to you until the needle is in its highest position.
See if the hinged latch located on the bobbin is locked into place. Pull the hinged tap up and remove the bobbin case. When you insert the bobbin, it should always make a clicking sound. This way you will know that it is inserted properly and will not fall out.
At this point, the handwheel can be used to move the needle and look at the area around the bobbin case. The needle should not hit the bobbin. If it does, insert it one more time. Should the problem persist, take it in for repairs.
Bobbin Case Making Strange Sound
Should the bobbin case make unusual sounds, the first thing to do is to clean the machine. Noises can arise from needles touching something inside the machine, or something may be stuck.
If this doesn’t solve the problem, change the needle as it may be bent. It could be touching the inner parts of the sewing machine.
Refrain from sewing if your machine is making strange sounds. The noise it makes should be normal for the machine. There should be no ticking or scratching sounds coming from it.
The noise usually does stop once the machine is cleaned.
Lint Build Up
Bobbin problems may still be a factor if there is excessive lint in your sewing machine. It needs to be cleaned thoroughly on a regular basis. The bobbin area should be dirt, hair and lint-free to avoid jams.
Lint in a sewing machine is the fluffy material that accumulated in the machine as it is being used. It will continually build up as you use it. Therefore, the machine needs to be cleaned regularly. If it is not cleaned, the machine can be damaged, there can be mechanical issues, or problems with the needle may arise.
To clean your sewing machine properly, do the following steps:
- Unthread the machine. Take apart the bottom plate and bobbin fully to ensure all corners can be cleaned.
- One the dirt and lint are removed from the bobbin area, give it a bit of oil. Don’t use too much. If you are concerned about overdoing it, place a drop of oil on the brush. Apply it to the moving parts. Do not use canned air in the bobbin area. The lint will only blow further into the machine.
- Use only one brush to clean your sewing machine. This is so dirt will not move further into the machine. Remove it gently.
- If your vacuum has a small head-mount, this will enable you to get further into the machine. Be careful that you don’t accidentally build machine parts.
- Removing the bottom plate should be easy. However, Singer, Janome, Brother, and Pfaff sewing machines may require a screwdriver to accomplish this task. The area around the bobbin case and the bobbin should be cleaned if you ever experience bobbin challenges. It is recommended every second time the bobbin thread is changed.
If your sewing machine has not been used for an extended amount of time, or your environment is dirty/dusty, it may need to be cleaned more frequently.
These are the common reasons for a sewing machine to give you bobbin problems. When issues arise in this area, there is usually a simple fix to get things back up and running. Most often, problems boil down to tension, not threading the machine properly, or cleaning the machine.
Beginners may find this issue if they are not threading the machine correctly. Bobbins jam quite quickly when this is not done properly. While it may be a bit messy and frustrating, beginners should take their time when threading a machine to make sure that it is done correctly. This will save you a great deal of time and aggravation.
Sewing machines need to also be cleaned on a consistent basis. This is true of any machine. Things can easily build up inside the machine and cause bobbin issues. However, this is only the tip of the iceberg.
Not cleaning the machine can wear it down over time and cause expensive mechanical issues. This is especially true if it is a computerized model. You always want to make sure it is continually running in top condition.


")


