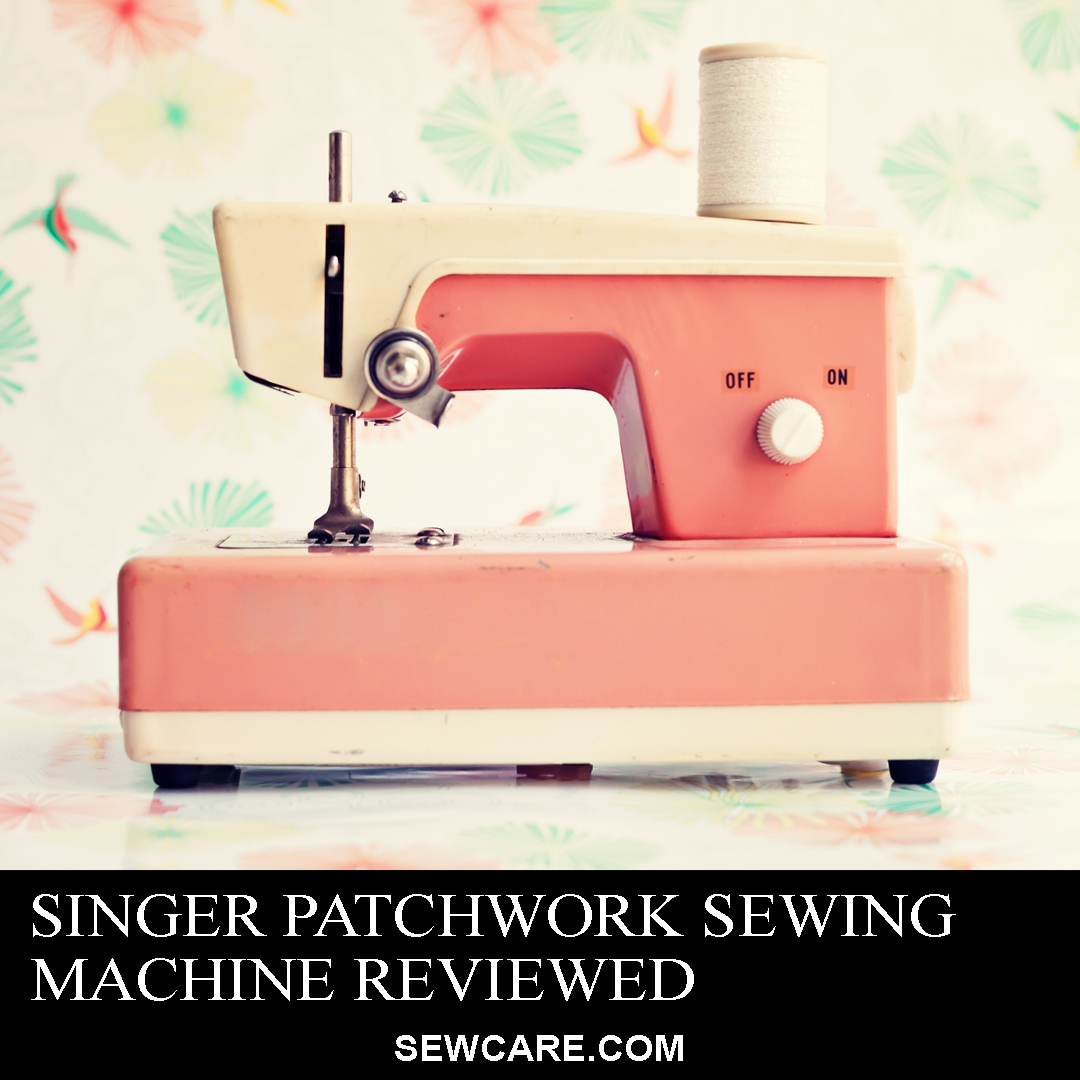
Whether you’rejust starting out or you’ve been sewing for years, you’ve probably heard about Singer sewing machines. Founded in 1863, the Singer Corporation has grown into one of the largest manufacturers of home sewing, quilting, and embroidery machines in the world.
Singer has built a reputation for offering some of the most user-friendly and affordable machines on the market.That’s why we’re going to review one of its more popular models:the Patchwork 7285Q. We’ll also go over some simple directions to help you get started with your new Singer machine. If you’re in the market for a machine that can handle a wide variety of sewing and quilting tasks, this could be the perfect option for you.
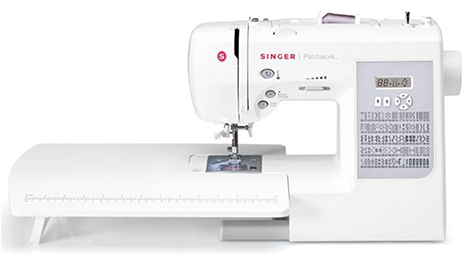
 The Singer Patchwork 7285Q Sewing and Quilting Machine
 The Singer Patchwork 7285Q Sewing and Quilting Machine
 This is the perfect home machine for quilters and sewing enthusiasts. With over 100 stitch options to choose from, buyers will be impressed by the Patchwork 7285Q’s versatility. Essentially, it’s an all-in-one machine that can handle nearly any project you can throw at it.
 What We Like About the Singer Patchwork
 What We Like About the Singer Patchwork
Affordability
For a machine that can handle so many sewing and quilting tasks, the Singer Patchwork’s price is more than reasonable. Other machines in its class often cost hundreds of dollars more and, in many cases, they have fewer features.
The relatively low pricing means this machine is a practical choice for those who are new to sewing and quilting. However, it’ll also be able to keep up with their growing skills.
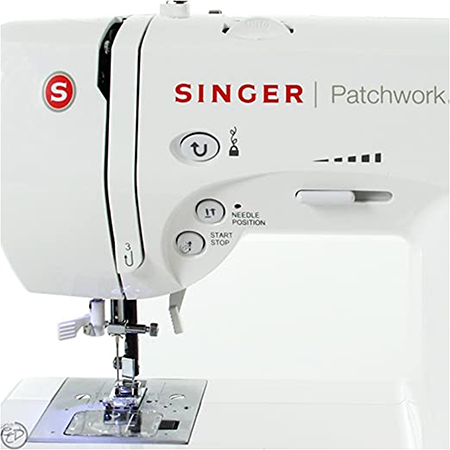
User-friendly Design
Thanks to features you usually only see in the higher-end machines, the Singer Patchwork can save you a significant amount of time sewing.
We really liked the programable needle positioning, which is controlled with a simple sliding button. You even have a convenient stop-and-start button, which gives users the option to have the machine sew for them at a slow speed. This will help you get through the bigger projects with less frustration and strain.
We also liked that you can set the maximum sewing speed using a conveniently located sliding control lever. While you still control the speed with a foot pedal, having an adjustable maximum speed will help cut down on mistakes and is a great feature for beginners.
The large, detachable work platform is also really handy. It features a measuring guide, which reaches 13inches in length. If you’re working on more precise projects, or you prefer to work without the plate, you can pop it out of position to work with a free arm configuration. The plate even has a fold-away kickstand, so you can reduce the size for easier storage.
 Easy to Maintain
The exterior surface is smooth and free from jagged edges, so it can be wiped down with a damp cloth.
We really appreciated the fact that it’s a self-lubricating machine, which means users won’t have to worry about oiling the internals themselves. This save you time and ensures the machine is well-maintained.
It’s also surprisingly easy to remove lint and other debris fromthe Patchwork. Just pop out the presser foot so you can clean out all of the buildup that would otherwise restrict performance.
Perfect for Quilters and Garment Sewers
While you can use this machine strictly for sewing projects, it really stands out during quilting tasks. As mentioned above, it performs over 100 different stitch options, including a blanket stitch. The blanket stitch option is perfect for quilters, as are several zig-zag stitch options. It even comes with quilting-specific accessories, such as a Darning/Embroidery foot.
For garment sewers, six unique buttonhole options are extremely helpful. Whether you need a basic bartack-style buttonhole, or the more specialized keyhole style you need for menswear, the Patchwork can handle it.
Typically, quilters have to choose quilting-specific machines, so having the ability to complete both sewing and quilting projects with the same device is really handy.
Overall Versatility
With a needle threader, customizable stitching settings, over 100 built-in stitch options, and a crystal-clear LCD display screen, this is the perfect all-in-one sewing and quilting machine.
It also comes with 10 different presser feet, which can be changed quickly using a simple lever system. The drop-in bobbin and spool systems work with a variety of thread options, including cross-wound spools.
The Singer Patchwork can work with delicate and thin fabrics or more heavy-duty materials.
 Overall Impression
This is an excellent machine for sewing and quilting enthusiasts alike. If you’re looking for a budget-friendly option that offers outstanding versatility in the form of an intuitive, high-performance machine, you can’t go wrong with the Singer Patchwork 7285Q.
10 Directions for Use
If you’ve chosen to invest in a Singer Patchwork, the following directions will help you get started:
1. Turning it On
Connect the plug of the power line cord into the cord socket and an appropriate wall outlet. Move the power switch to the “on” position.
2. Setting Spool Pins
Place the thread spool on the top pin and secure with a spool cap to allow for a smooth flow of the thread. Select the spool pin cap in accordance with the diameter of the spool itself.
3. Using the Presser Foot Lifter
Lower the presser foot lever to the lowest position if you’re ready to sew. Raise it to the middle position if you’re inserting or positioning fabric, or if you’re changing the presser foot. Lift it to its highest position for thicker fabrics.
4. Using the Darning Plate
If you need to control the fabric feeding for free motion work or button sewing, raise the needle and presser foot before positioning the darning plate onto the needle plate.
5. Attaching the Work Table
If you prefer a level work platform, you can lift the extension table and slide it into the fitting guides on either side of the front of the machine. Lower the support leg once the table’s in position.
6. Removing the Work Table for FreeArm Sewing
If you’re doing freearm sewing and don’t need the worktable attachment, hold it firmly with both hands and pull it forward. You can then position the freearm plates for a smoother surface.
7. Winding the Bobbin
- Put a spool of thread on the spool pin before securing it with the spool pin cap. Take the thread from the spool before putting it through the thread guides. Be sure to pull the thread securely into the bobbin winding tension disk.
- Put the end of thread through the hole into the bobbin. Push the bobbin winder shaft to the far-left position.
- Place the bobbin onto the shaft with the end of the thread coming from the top of the bobbin. Push the bobbin winder shaft toward the right.Once it clicks,hold the end of thread.
8. Threading the Bobbin Thread
Raise the needle to the highest position and remove the bobbin cover plate. Insert the bobbin and make sure it turns counterclockwise. Pull the thread about six inches and lead it toward the back of the machine, then replace the cover plate.
9. Changing the Presser Foot
Position the needle in the upward position and push the presser foot release lever. Once the existing foot is removed, place the desired foot on the needle plate and lower the presser foot lifter so it snaps onto the new foot.
10. Using the Start/Stop Button
When sewing without the foot control pedal, the machine will start to slow once you’ve pushed the Stop/Start button. The speed will increase if it’s pushed again.
Find the Singer 7258 here.


