The first thing you’ll need to know about your Brother sewing machine is how to thread it.
Threading a machine you’re unfamiliar with can be a difficult task. Even if the differences are subtle, the way you thread one machine will almost always vary from another.
How Can We Help?
The following step-by-step guide will explain everything you need to know about threading a Brother sewing machine.
We’ll detail how you should thread the upper threading through the needle on a Brother sewing machine, how you wind the bobbin, and how you install the bobbin itself.
It shouldn’t matter which Brother sewing machine you’re using as almost every recent model is threaded the same way. It’s worth mentioning that some of the company’s industrial sewing and embroidery machines have different threading mechanisms, so this guide may not be helpful if you own one.
 Before You Get Started:
 Before You Get Started:
 Always read through your sewing machine’s instruction manual before getting started. It never hurts to familiarize yourself with a new machine before operating it, even if you have years of experience.
If you’ve purchased a second-hand Brother sewing machine and you don’t have the original instruction manual, the company offers digital version on their website.
The instruction manual will also explain the proper way to thread your machine, so rereadit if you have any questions after looking through our step-by-step guide.
How to Thread Your Brother Sewing Machine
Step 1 – Turn the Machine Off
Always make sure your sewing machine is off while you’re setting it up or making an adjustment.
To ensure your Brother sewing machine is powered down, make sure the power switch is in the off position. Some people will even unplug their machine just to make sure it won’t turn on while they’re threading it.
 Step 2 – Raise the Presser Foot Lever
 Step 2 – Raise the Presser Foot Lever
 Lift the presser foot lever upward. This will raise the presser foot and allow you to begin the threading process. The lever in most Brother sewing machine models is located behind the presser foot itself, as indicated by the diagram below.
 The presser foot lever
 The presser foot lever
Step 3 – Raise the Needle
To raise the needle, turn the hand wheel – located on the rear of the Brother sewing machine – toward you in a counter clockwise motion.
There is a raised marker on the exterior of the wheel. After you’ve turned the wheel to the correct position, the needle should be elevated and the raised marker on the wheel’s exterior should point upward.
You won’t be able to thread the machine unless the needle is correctly raised, so it’s important to get this step right.
 Raised hand-wheel marker
 Raised hand-wheel marker
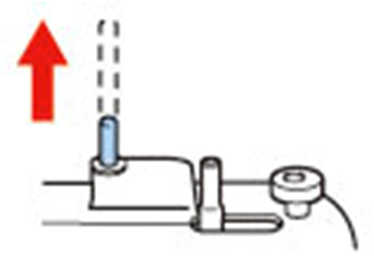
Step 4 – Expose the Spool Pin
You must pull the spool pin up before you can attach a spool of thread. Make sure it’s pulled out completely.
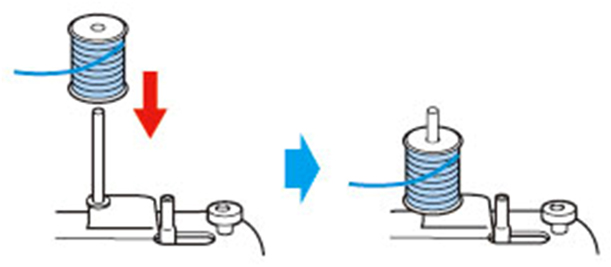
 Step 5 – Position a Spool of Thread
 Step 5 – Position a Spool of Thread
 Place a spool of thread on the spool pin. Make sure it’s positioned the same way as in the diagram.
The thread could tangle on the spool if the spool of thread is positioned in the wrong place or set incorrectly. Tangles are frustrating and time-consuming to correct. They can even cause the needle to break.
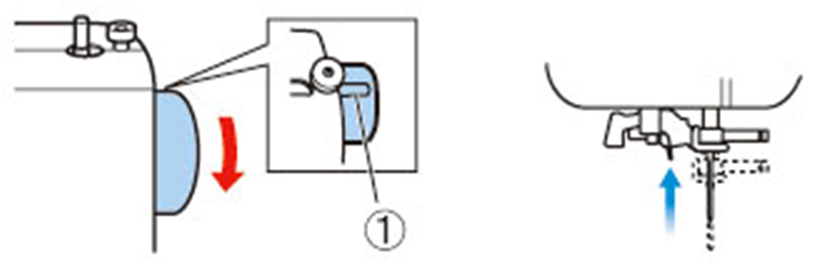
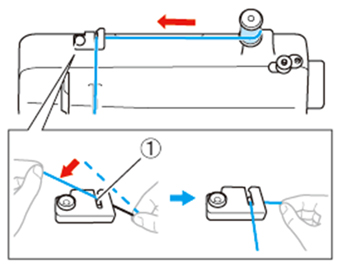
 Step 6 – Begin Threading
 Step 6 – Begin Threading
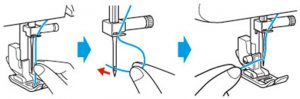
 Take the end of the thread from the spool with your right hand. Pass the thread toward you by following the grooved line on the thread guide. Pull the thread through the spring, as detailed in the diagram below.
Make sure the spring in the groove is properly catching the thread.
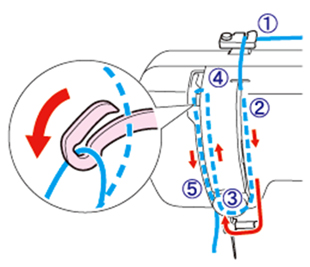
 Step 7 – Feed the Thread Through the Machine
 Step 7 – Feed the Thread Through the Machine
 Feed the upper thread as shown in the diagram below. Make sure you’re not pulling too hard or you could tear the thread.
 Step 8 – Guide the Thread Through the Take-Up Lever
 Step 8 – Guide the Thread Through the Take-Up Lever
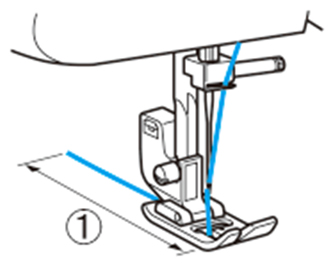
 Follow the diagram below to guide the thread through the take-up lever. Go from right to left, as indicated in the diagram.
 Thread take-up lever
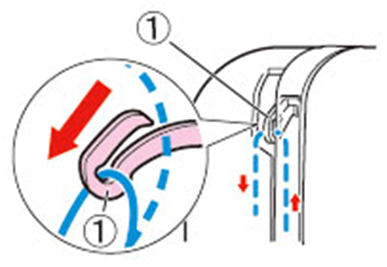 Thread take-up lever
Step 9 – Position the Thread Behind the Guide
You can now put the thread behind the needle bar thread guide, which is located above the needle. It should be easy to pass the thread behind the needle thread guide. Hold the thread in your left hand and feed it with your right.
 Needle bar thread guide
 Needle bar thread guide
Step 10 – Thread the Eye of the Needle
Pass the thread through the eye of the needle. Follow the diagram and move the thread from the front to the back.
 Step 11 – Finish Threading the Machine
 Step 11 – Finish Threading the Machine
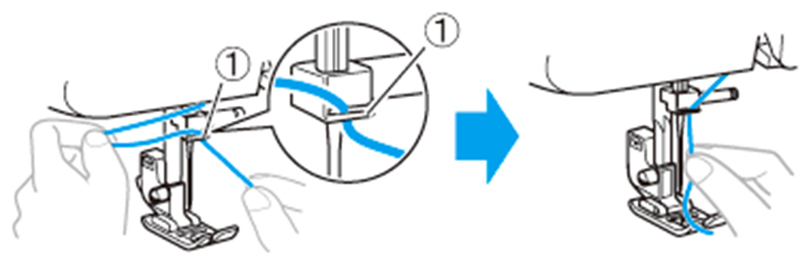
 Pass the end of the thread through the presser foot. Make sure you pull about two inches, or five centimeters, of thread toward the rear of the machine.
 Roughly 2 inches (5 cm) of thread
 Roughly 2 inches (5 cm) of thread
You Have Now Threaded Your Brother Sewing Machine
If you’ve followed the steps above, you will have correctly threaded your Brother sewing machine. Remember, you should still take the time to read through the manufacturer’s instruction manual, which will help you get the most out of your machine.You’ll also notice most Brother sewing machines actually include threading instructions on the body of the machine.
Once you’ve practiced a few times, threading your sewing machine will be a breeze.
Recommended Brother Sewing Machines
If you are looking to purchase your first Brother sewing machine, or you would like to replace your existing machine with a newer model, we recommend the following:
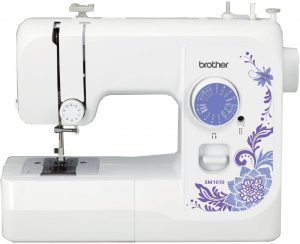
For Beginners – Brother XM1010 Sewing Machine
The Brother XM1010 is the perfect sewing machine for beginners and occasional hobbyists. It features 10 unique, built-in stich patterns and comes with a complete set of sewing accessories.
 It is a great machine to learn with and it has enough advanced features that you can continue to use it as your sewing skills grow.
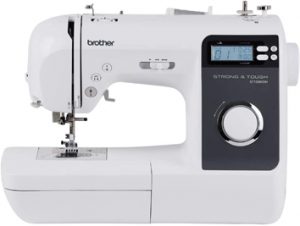
For Intermediates – Brother ST150 HDH Sewing Machine
For those that are looking for a machine that can keep up with their more advanced sewing skills, we recommend the Brother ST150 HDH. It is an incredibly versatile machine that features 50 built-in stitch styles and a handy LCD display screen.
 The ST150 HDH will allow you to tackle all sorts of sewing projects and it is designed to last.


