Hand-held sewing machines offer users a convenient way to make quick stitch repairs and adjustments. While full-size sewing machines are undoubtedly the better option for large-scale tasks, a hand-held sewing machine can be really helpful in certain situations.
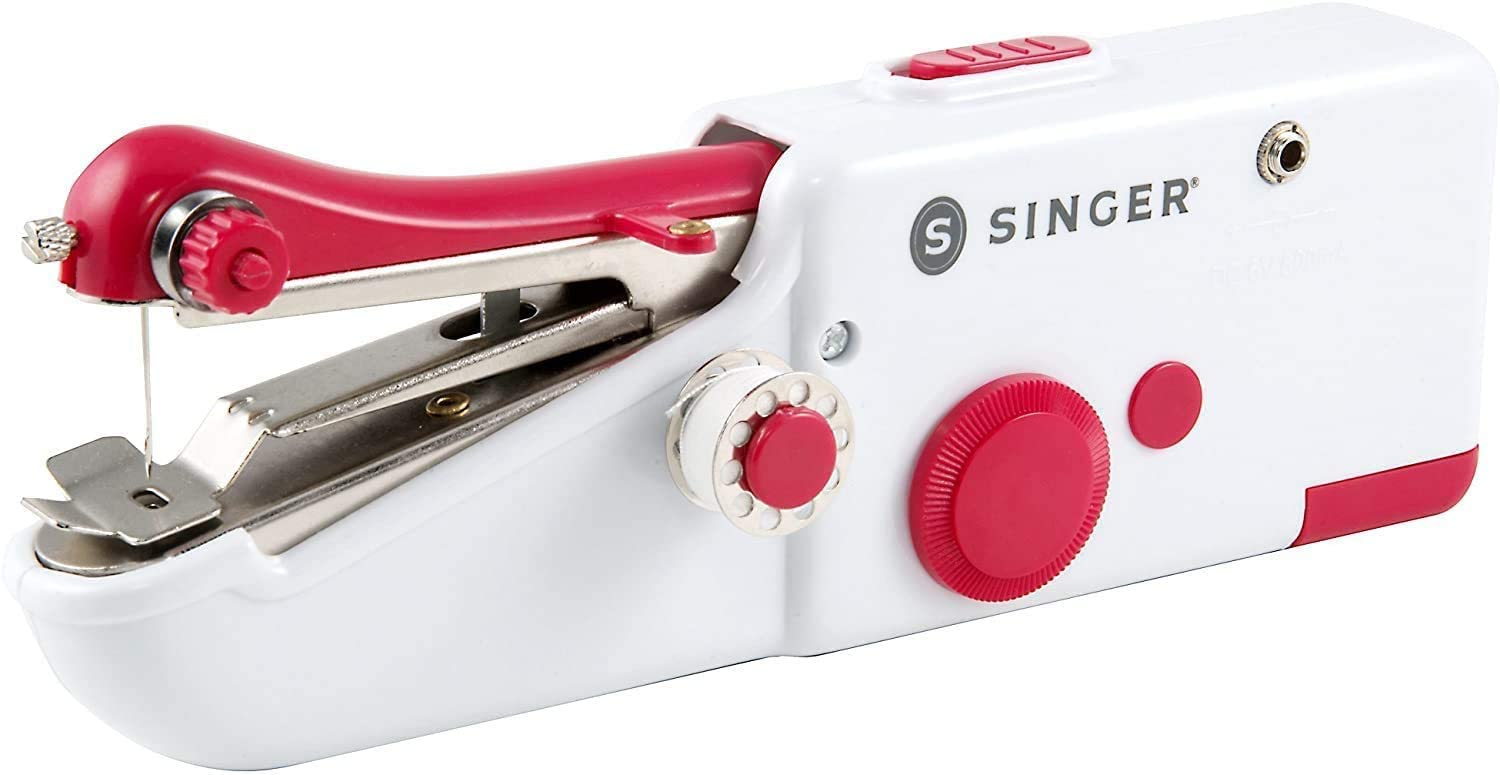
Not only are they extremely portable, but they also tend to be much less expensive than full-size sewing machines. If you are in the market for a hand-held sewing machine, you cannot go wrong by choosing the SINGER Handy Stitch Sewing Machine.
The Singer Handy Stitch is the most compact and portable handheld sewing machine. It is ideal for quick repairs on all kinds of household items. Whether you need to make a quick repair to a set of drapes or alter clothing items, this little, battery-powered sewing machine is up to the task.
To help you get the most out of your machine, we are going to explain how you use this tiny handheld sewing machine.
Directions for Using the Singer Handy Stitch Sewing Machine
Before you get started, you will need four AA batteries. It is also a good idea to have a pair of scissors or a sharp thread ripper handy. Even if you are an experienced sewer, it is a good idea to do a practice run before you attempt to stitch anything important. The SINGER hand held sewing machine should come with a piece of test fabric, which SINGER includes to demonstrate that the sewing machine was tested before it was sold. It also doubles as a convenient piece of scrap fabric for you to perform your test stitches.
Read the Instruction Manual:
Remember, the first step you take whenever you purchase a new piece of sewing equipment should be to read the instruction manual. Even if you are an experienced sewer, taking the time to learn the ins and outs of your new machine will help you use it to your full potential.
Once you have read through the instruction manual, you can follow these steps to use your new machine:
Step 1 – Start by making sure the On/Off switch is in the Off position. The switch has a safety lock on it, so you will need to push this lock forward to change the switch to the Off position.
Once this is complete, raise the needle arm to its highest position, which you should always do with the rotary wheel, rather than manually repositioning it by force.
Step 2 – Lift the fastening plate while making sure you are not accidentally pushing down on the needle arm. Place the piece of test cloth that came with the machine underneath the fastening plate.
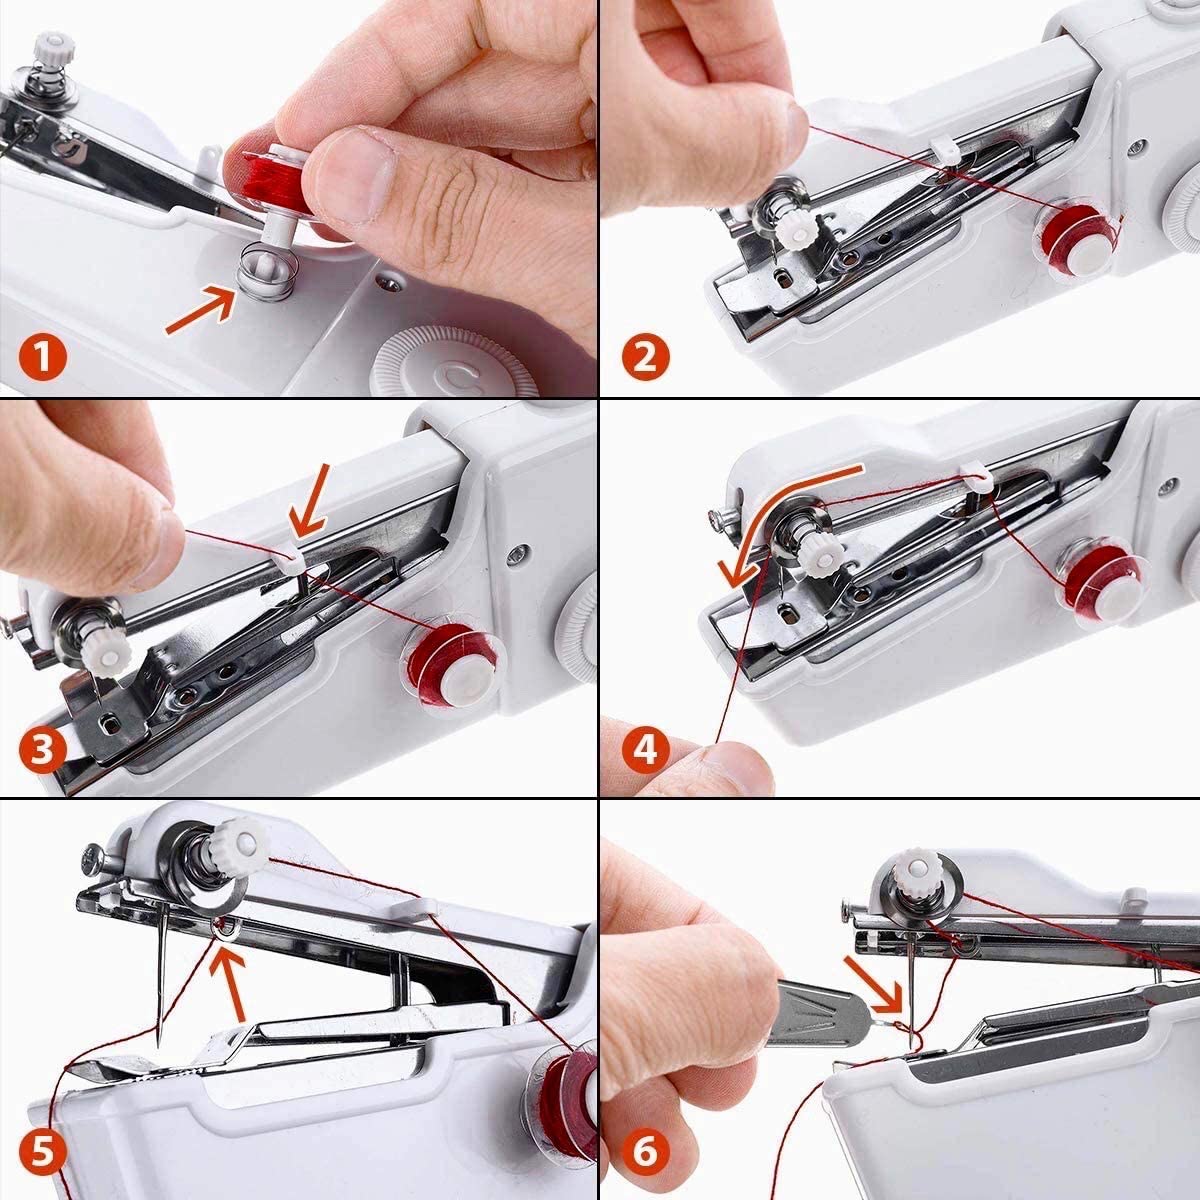
Step 3 – Pull 2 inches of thread through the needle. If the needle has not been threaded, you will have to do this yourself.
Step 4 – Hold the machine with one hand and place your thumb over the On/Off switch while supporting the underside of the machine with your fingers.
Step 5 – Push the power switch to the On position by sliding it forward. Use your other hand to hold the cloth and control the direction and speed as you pull it through the machine.
You should always be careful not to pull the material you are working on too quickly.
Step 6 – Once you have created the desired number of stitches and you are ready to finish the seam, raise the needle arm to its highest position by adjusting the rotary wheel. Use a seam ripper or a pair of scissors to cut the thread approximately 3 inches out.
Step 7 – Once the thread is cut, turn the rotary wheel to lower the needle into the fabric and keep turning the wheel until the needle arm is at its top position. From here, raise the fastening plate and remove the material by pulling it out to the left.
Make sure when you are removing the material that you are not pulling the thread with it, as this can cause the entire seam to unravel. Once it has been removed, you will need to manually tie a knot in the thread.
How to Finish the Seam by Tying a Knot in the Thread
Once you have removed the material you are working on and pulled at least 3 inches of thread out, you can tie it off to complete the seam.
Start by sliding the thread underneath the last stitch in the seam. Pass about 1 inch of thread through from top to bottom. Then pass the thread through the loop that has been created and pull it tight to create a knot.
After a knot has been created, you can use a pair of scissors to cut the excess thread. Congratulations, you have used the SINGER Handy Stitch to complete your first seam!
Adjusting Thread Tension:
Thread tension can be easily controlled by simply turning the tension dial. If the stitches are too tight, turn the dial to the left. Oppositely, if they are too loose, turn the control to the right.
Installing a Thread Spool:
To install a new thread spool, loosen the bobbin nut and remove the existing bobbin. Slide the new thread spool into the extension spindle and then reconnect it to the bobbin shaft.
Replacing the Needle:
If you need to replace the needle in your SINGER Handy Stitch, start by loosening the set screw. You might want to use a screwdriver at this point. Once it has been removed, use an appropriate sewing machine needle.
Install the needle with the flat side facing the front of the machine. Once it is in position, you can tighten the set screw and you should be okay to use the new needle.
Final Words
SINGER has a strong reputation for offering outstanding customer service, if you have any issues with your Handy Stitch, or you have any questions about how you should be using it, it is always worth reaching out to the company.
While it might not be an adequate replacement for your full-size sewing machine, it is a handy machine that can be helpful in the event of emergency projects and when you have to make quick repairs.
You can find the Handy Stitch Sewing Machine HERE!


